Programming
Programming Manual
View or download a pdf version of a programming manual by selecting one of the options below. Otherwise continue scrolling.
Quick Reference
(Click to jump to that section)
Operating the Apollo Opening Roof System with the Telis Remote
Control Board Wiring
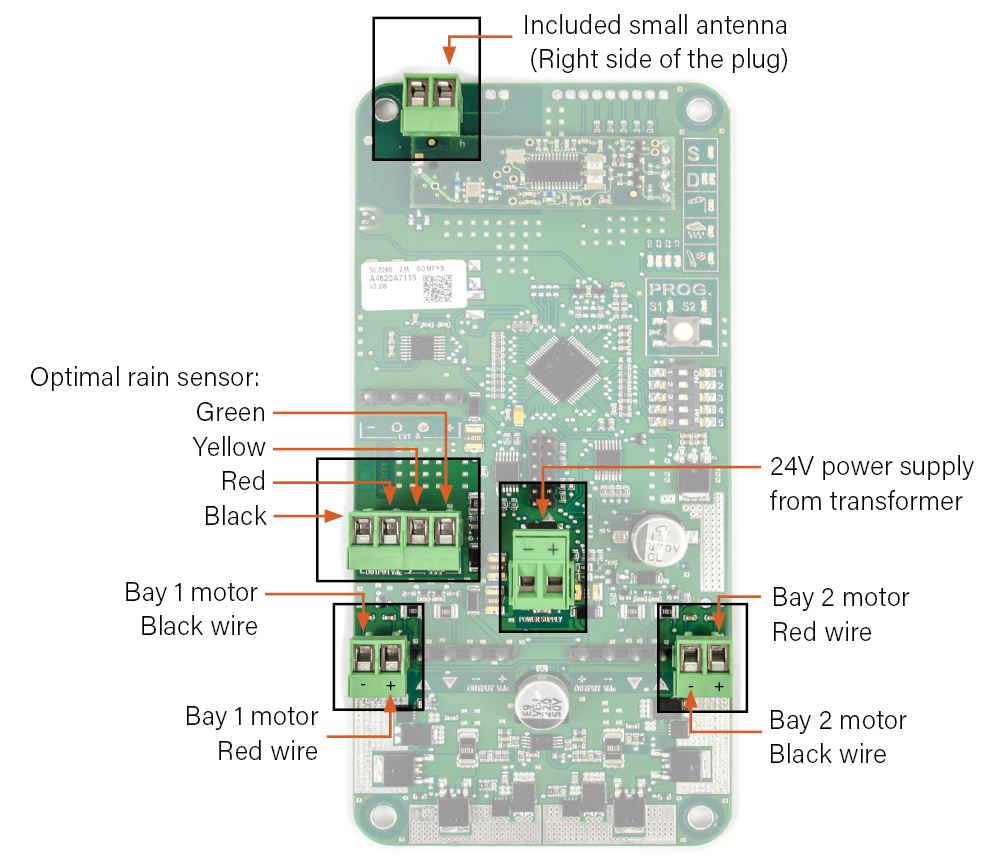
Control Board Overview
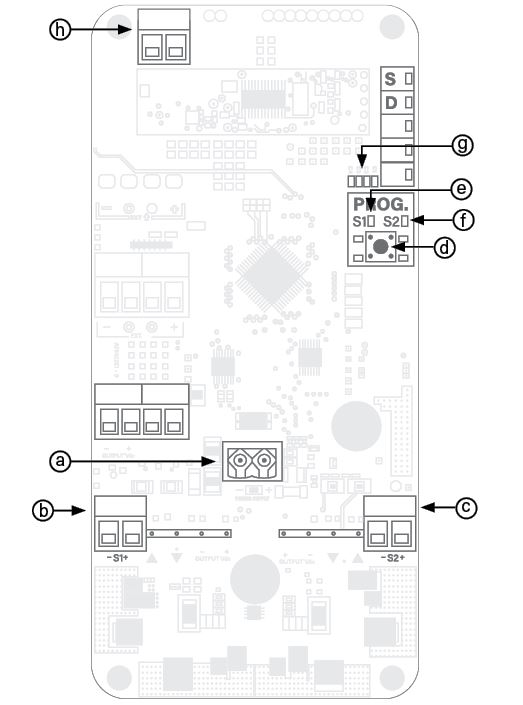
a. 24V Power Supply Input
b. Drive output S1
c. Drive output S2
d. PROG button
e. S1 LED
f. S2 LED
g. Power Indicators
h. Antenna
Somfy Remote
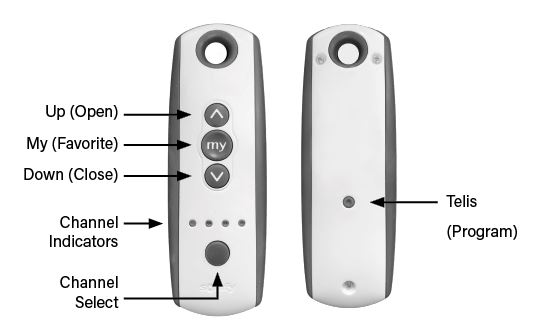
Channel Indicators
*To select a specific channel on your Somfy remote, press the “channel select” button until the corresponding light(s) indicate you are on the correct channel.
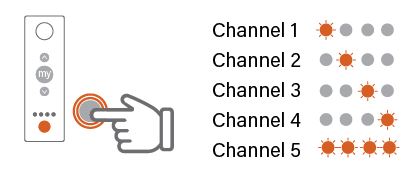
Somfy Programming:
*To ensure accurate programming of the Apollo control system:
1. Verify that the power supply is connected to the control board (a).
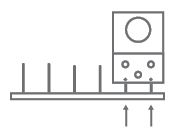
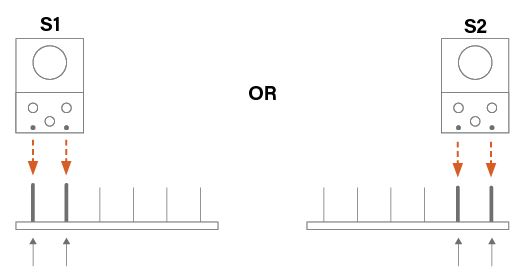
2. Verify that the first motor is connected to S1 (b) on the lower left side of the control board and that the terminal plug is located on the far two left pins.
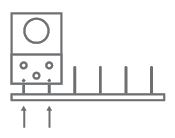
3. If a second motor is being used, ensure it is connected to S2 (c) on the lower right side of the Control Board.
1. Initiate Programming:
1.1 Press and hold the PROG button (d) on the control board for approximately 12 seconds until all LEDs begin to flash (g). The motor will “jog” (briefly extend and retract) indicating the control board is reset and is ready to begin programming.

2. Programming S1 to Motor 1:
2.1 On the control board, ensure the LED light for S1 is blinking. If it’s not, press and hold the PROG button (d) on the control board for 3 seconds. S1 is now ready to be programmed to motor 1.

2.2 On the remote, select channel 1. To do this, press the “channel select” button until the far left LEDs light up.

2.3 Press the “up” and “down” buttons simultaniously for approximately 3 seconds. Release when the motor begins to jog.

2.4 Again, press the “up” and “down” buttons simultaneously for approximately 3 seconds. The motor will begin to search for the end limits and will stop when fully extended.
Note: Do not interrupt the movement:

2.5 Press and hold the “my” button on the remote for approximately 5 seconds until the motor begins to jog.

2.6 Ensure that the S1 LED light is still blinking. If it is not, return to step 1.

2.7 Press the “telis” programming button on the back of the remote. The motor will jog. (Suggestion: use something with a point at the end to press the button. i.e. a screwdriver, pencil, etc.)

With an Apollo system using a single motor, programming is now complete.
2.8 Ensure the “up” and “down” buttons on the remote are controlling the motor properly.
Note: If the motors are moving in the opposite directions of the remote buttons, you can choose to correct the issue now, or finish programming the remaining motors and then refer to “Somfy Troubleshooting”.
3. Programming S2 to Motor 2:
3.1 Press and hold the PROG button (d) on the control board for 3 seconds. The S1 LED will begin to flash.

3.2 Briefly press the PROG button (d) again. This will switch to S2. Ensure that the S2 LED is now flashing.

3.3 On the remote, select channel 2. To do this, press the “channel select” button until the second LED light from the left lights up.

3.4 Repeat steps 2.3-2.5
3.5 Ensure that the S2 LED is still blinking. If it is not, return to step 3.1.

3.6 Press the “telis” programming button on the back of the remote. The motor will jog.

3.7 The S2 LED will stop blinking indicating you have finished programing the second motor to S2. With an Apollo system using two motors, programming is now complete.
3.8 Ensure that the “up” and “down” buttons are correctly controlling this motor.
4. Operating The Apollo Opening Roof System with the Telis Remote

4.1 Switch between channels by pressing the “channel select” button.

4.2 Open the louvers by pressing the “up” arrow on the remote, close them by pressing the “down” arrow.

5. Program the Telis Remote “My” Button
The Somfy Remote allows the Apollo System to be programmed to a preferred position. The “my” button is used to program this function.
5.1 Ensure you’re on the channel that corresponds with the motor you are programming by pressing the “channel select” button until the lights indicate you are on the desired channel.

5.1 Ensure you’re on the channel that corresponds with the motor you are programming by pressing the “channel select” button until the lights indicate you are on the desired channel.
Use the “up” or “down” buttons on the remote to begin repositioning the louvers.

5.2 Briefly press the “my” button when the louvers reach the position you want to program them to stop at.

5.3 Again, press and hold the “my” button until the motor jogs.

6. Copy and Paste Channels
Copy and past can be used on the same remote to function multiple motors on one channel. (Typically used to set up a “function all” channel to control all bays/sections at once.) It can also be used to set up two remotes to control the same system.
6.1 Set up the first remote. Follow steps 2.1-3.8.
6.2 On the first remote select the first channel to “mirror”. To change channels press the “channel select” button on the remote until the LED for the corresponding channel lights up.

6.3 Press the “telis” button on the back of this remote until the motor jogs.
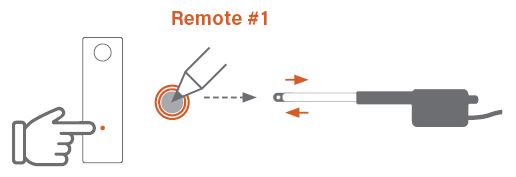
6.4 On the second remote, select the channel you want to paste the copied function to.
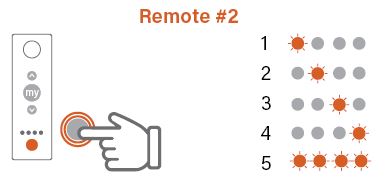
6.5 Press the “telis” button on the back of this remote. The motor will jog again.
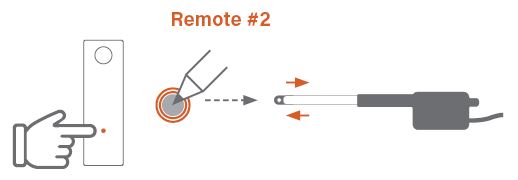
6.6 Repeat steps 6.2-6.5 for each channel.
Somfy Troubleshooting:
1. Motor Moving in the Opposite Direction
I.e. The motor is extending when you press “down” on the remote and retracting when you press “up” on
the remote.
Somfy Remote

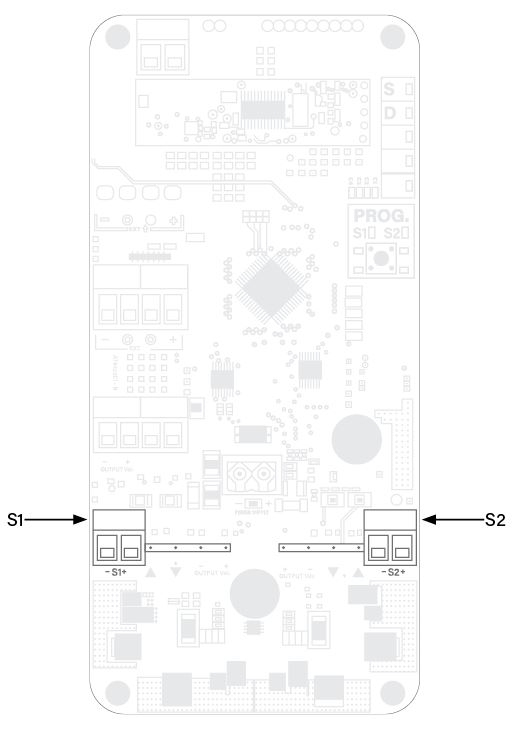
1.1 Establish which side of the control board the malfuntioning motor is plugged into. See illustration for location details.
1.2 Lift the corresponding motor’s plug in an upwards motion off of the control board.
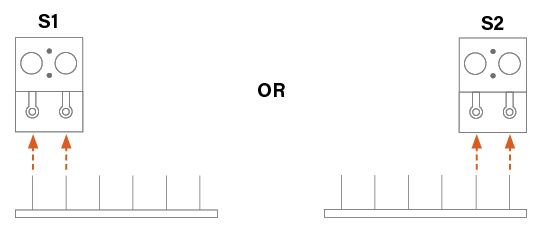
1.3 Rotate the plug 180°. (Illustration note: The face/direction of the plug you see is dependent upon which sides of the plug you placed the wires)
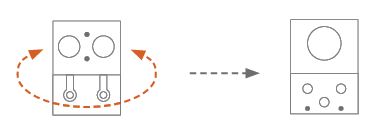
1.4 Reattach the plug to the far 2 pins on the corresponding side. The motor should now be moving in the correct directions.
1.5 Ensure the motor is working correctly. I.e. it extends when you press “up” on the remote, and retracts when you press “down” on the remote.
